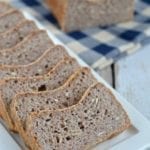
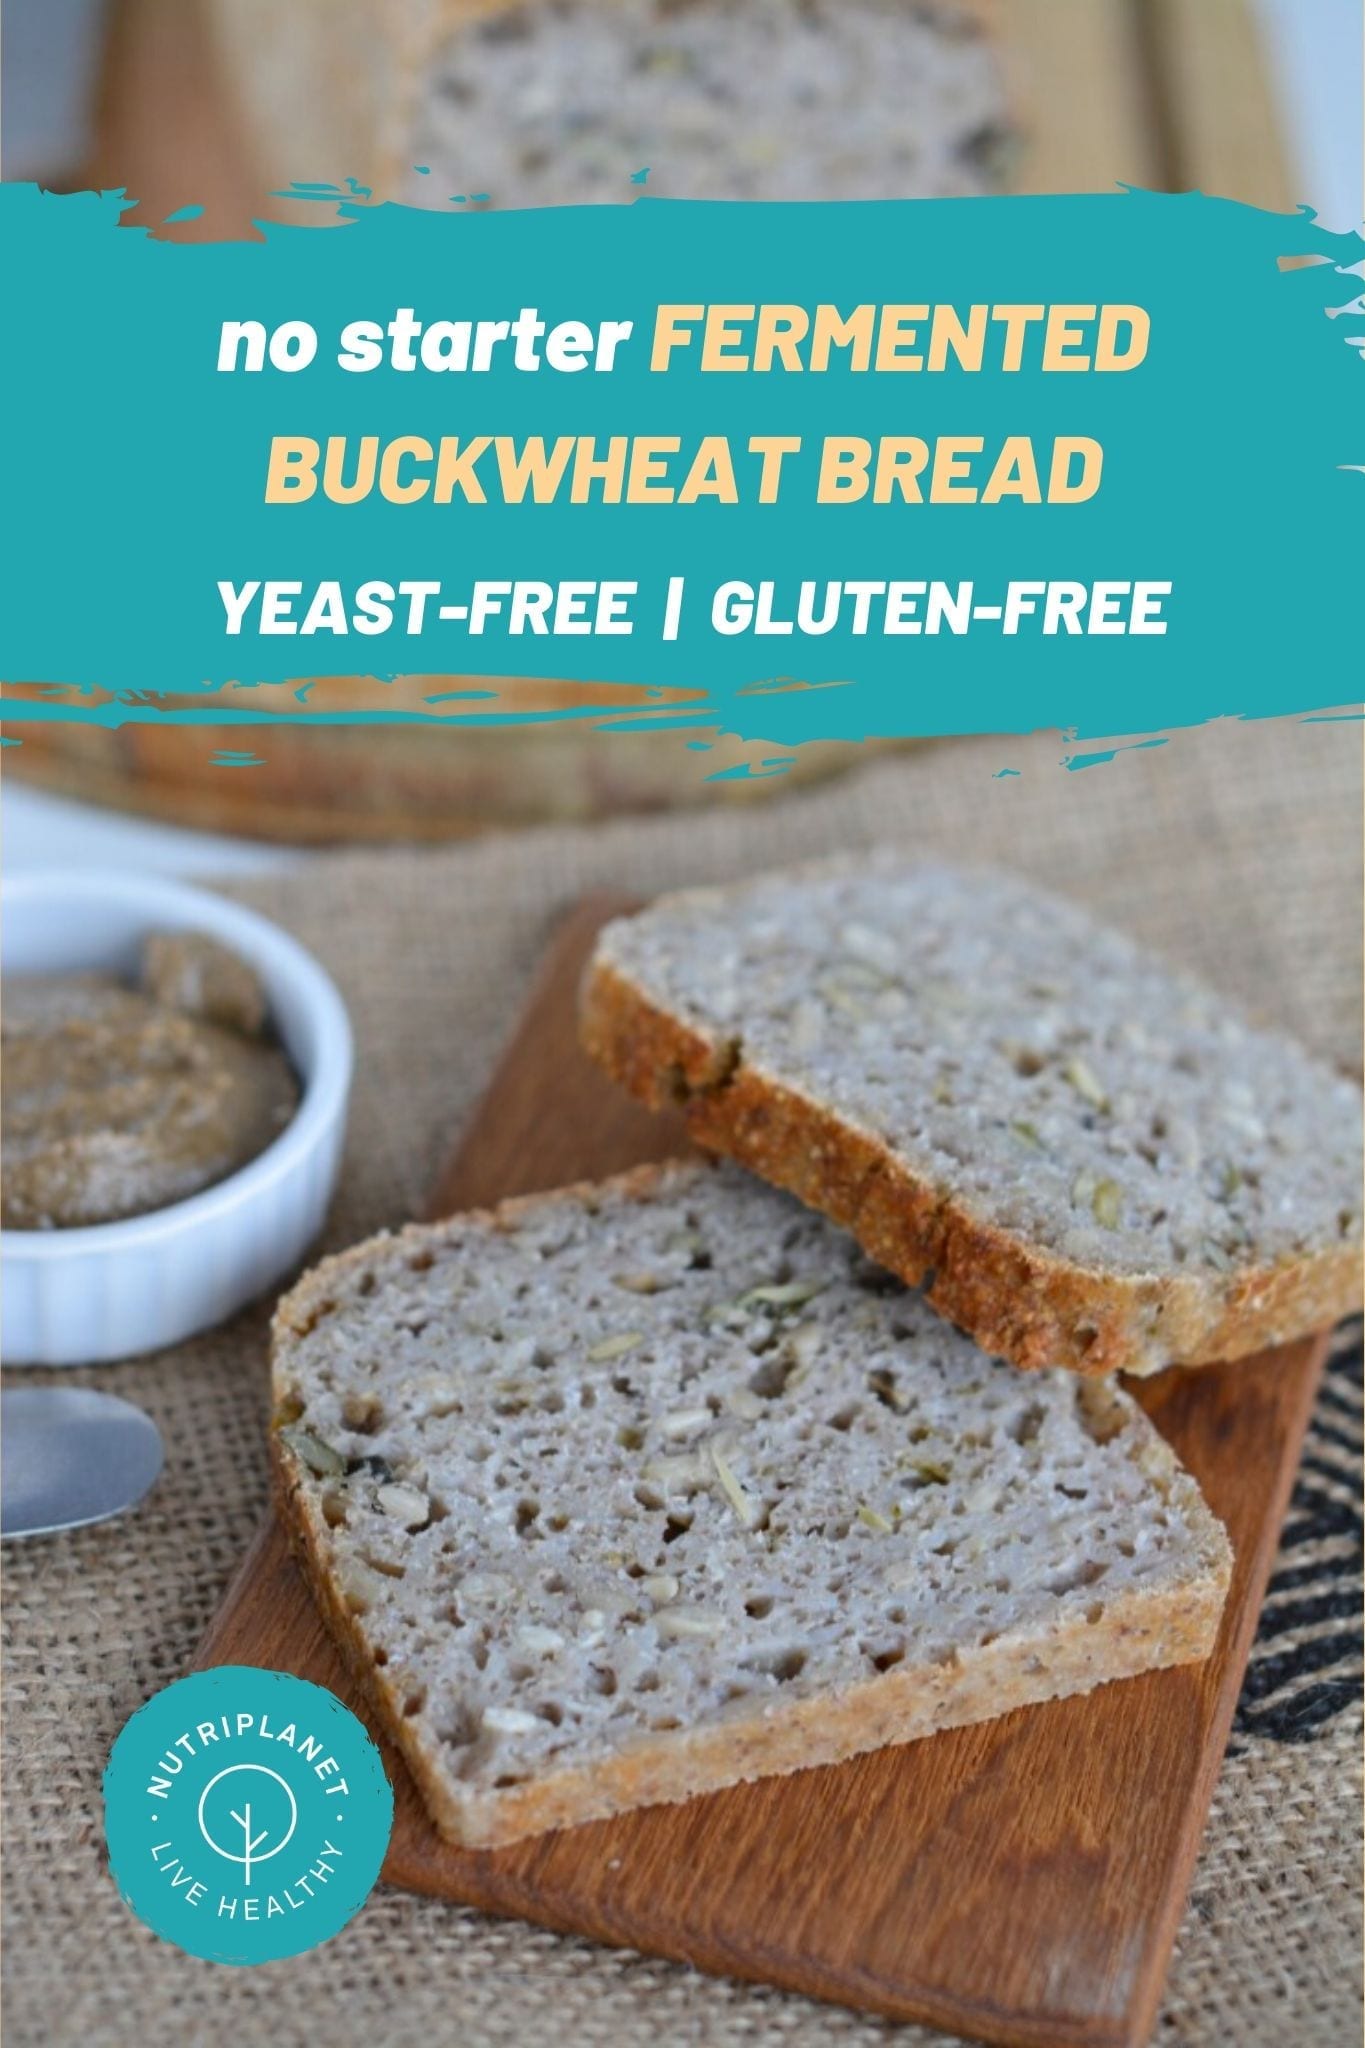
Learn how to make fermented buckwheat bread that uses no starter and is also gluten-free and sugar-free.
One of the greatest things I discovered after adopting plant-based diet was raw buckwheat – you can make boiled porridge, raw buckwheat porridge or ricotta, ricotta creams for cakes or to eat as is; to make cookies and pancakes, use soaked groats for buckwheat muffins and cakes, just boil for side or make patties, and even make yeast-free fermented buckwheat bread.
How to Make Fermented Buckwheat Bread
What is Buckwheat?
Buckwheat spread to Europe and Russia in the 14th and the 15th century from China, and the Dutch brought it to USA in the 17th century. Many of you might not know that buckwheat is actually not a grain, but a fruit seed related to rhubarb and sorrel and therefore is gluten-free and safe for those with celiac disease.
Buckwheat consists mainly of carbohydrates, but like seeds, it is also high in protein. Buckwheat is a very good source of manganese and a good source of magnesium, dietary fibre, copper, and phosphorus. Furthermore, it contains health-promoting flavonoids rutin and querceitin. Rutin functions with vitamin C to maintain healthy capillaries, to help heal wounds, to help form collagen in connective tissue, and to support a healthy immune system. Quercetin has antioxidant and anti-inflammatory effects.
Buckwheat groats have low glycemic index, meaning that unlike wheat flour, its carbohydrates break down slower, which make them more filling for a longer period of time, with less of an undesirable impact on blood glucose and insulin. Buckwheat groat protein also has a better structure than wheat protein, which has a poor amount of the amino acid lysine, with twice the amount of fibre compared to wheat.
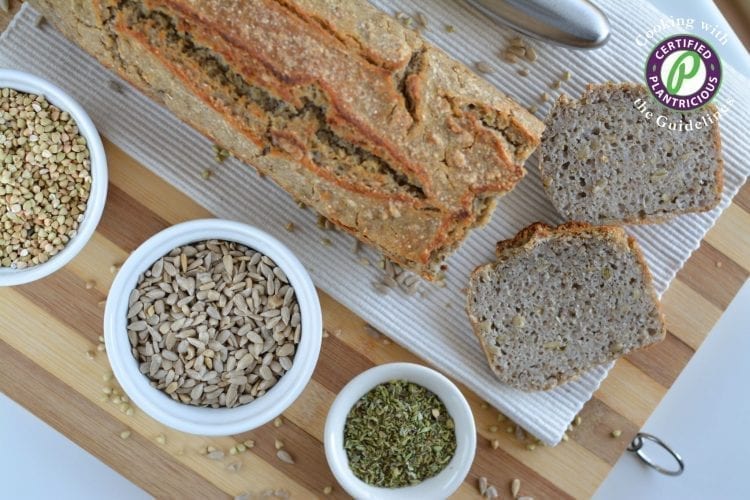
The Ingredients
This fermented buckwheat bread consists of very simple wholesome ingredients.
The main component is raw buckwheat groats i.e., not roasted buckwheat.
Then, for flavour, we’re using Himalayan salt and oregano.
Finally, let’s add some sunflower seeds. However, you can use any seeds of preference or, for a leaner version, discard them altogether.
The Process
Start by soaking raw buckwheat groats overnight or at least for 2 hours. It’s very important to rinse the soaked groats well (they get slimy after soaking) and then let drain for at least 5 minutes to get the extra water out. If you don’t follow this step with scrutiny, your batter may end up too runny and the bread won’t rise.
Next, place the drained buckwheat groats into blender with 290 ml of water. Blend on low speed until smooth batter forms.
Then, pour the batter into plastic or glass bowl (do not use metal bowl). Cover the bowl with clean cloth and place into a warm oven (35°C, 95°F).
Now it’s down to letting the batter ferment for 7 hours. After 7 hours you’ll see that the batter has risen and small bubbles have formed. If you don’t see that, let it ferment a bit longer.
Then, add all the other ingredients to this buckwheat bread recipe and gently and briefly stir with wooden or plastic spoon (do not use metal spoon). Do not over-mix as the batter will lose its fluffiness.
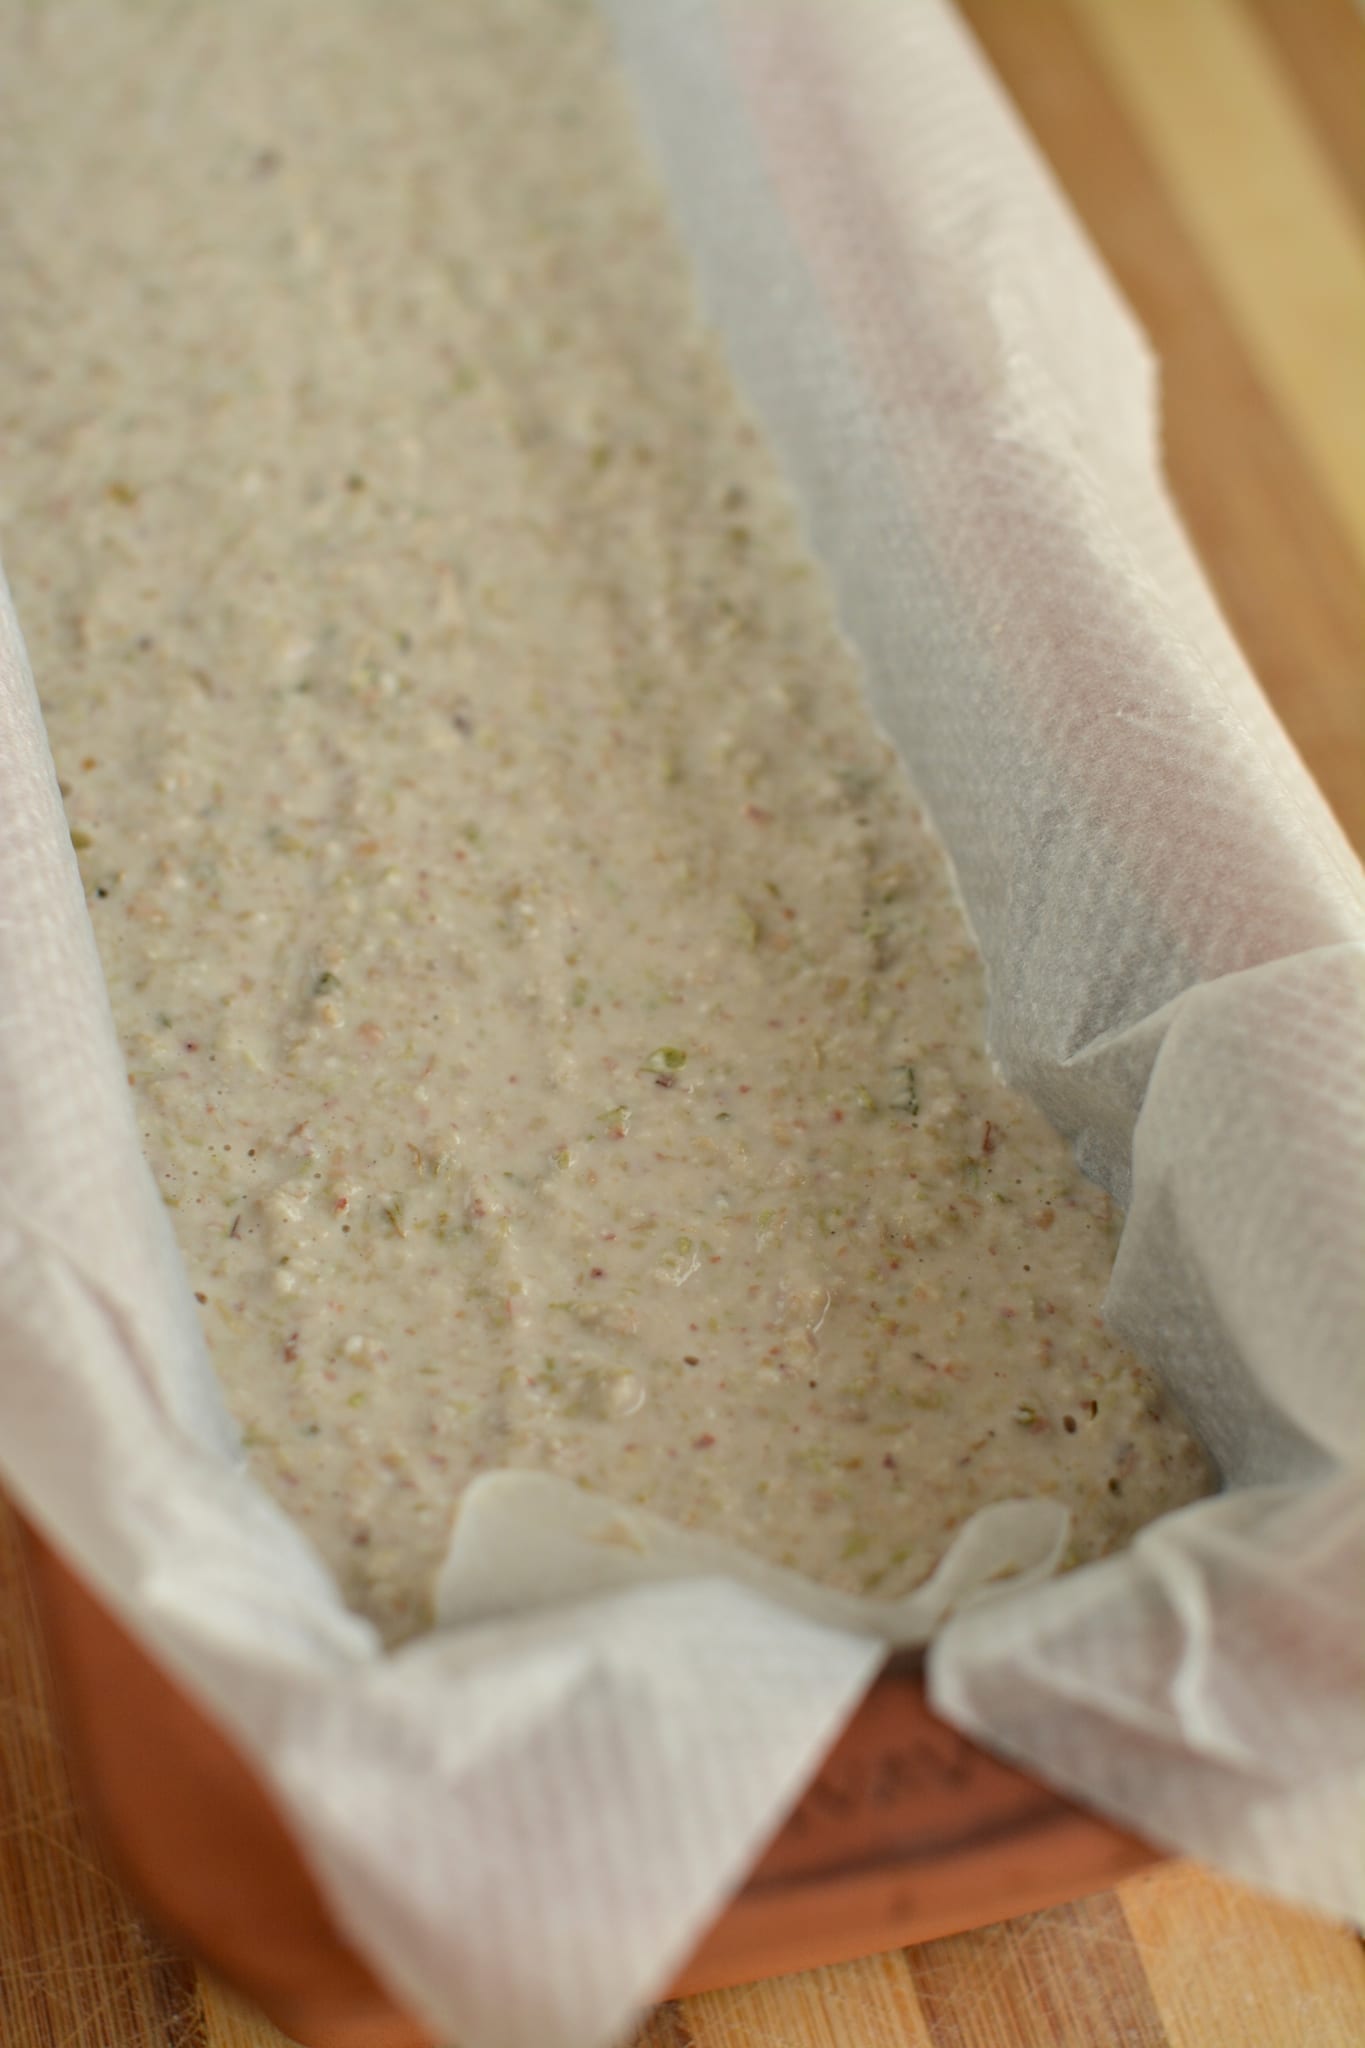
Pour the batter into a loaf pan lined with parchment paper. By the way, you can put the bread back into warm (not hot!) oven and let it rise for another few hours or you can bake it immediately for 1 hour at 175°C (350°F).
NB! Let the bread be in the oven while it warms up and DO NOT use speed heating or fan! Count the hour from when the oven has reached the right temperature. I put the timer to 1 hour and 10 minutes as it takes 10 minutes to reach 175°C (350°F).
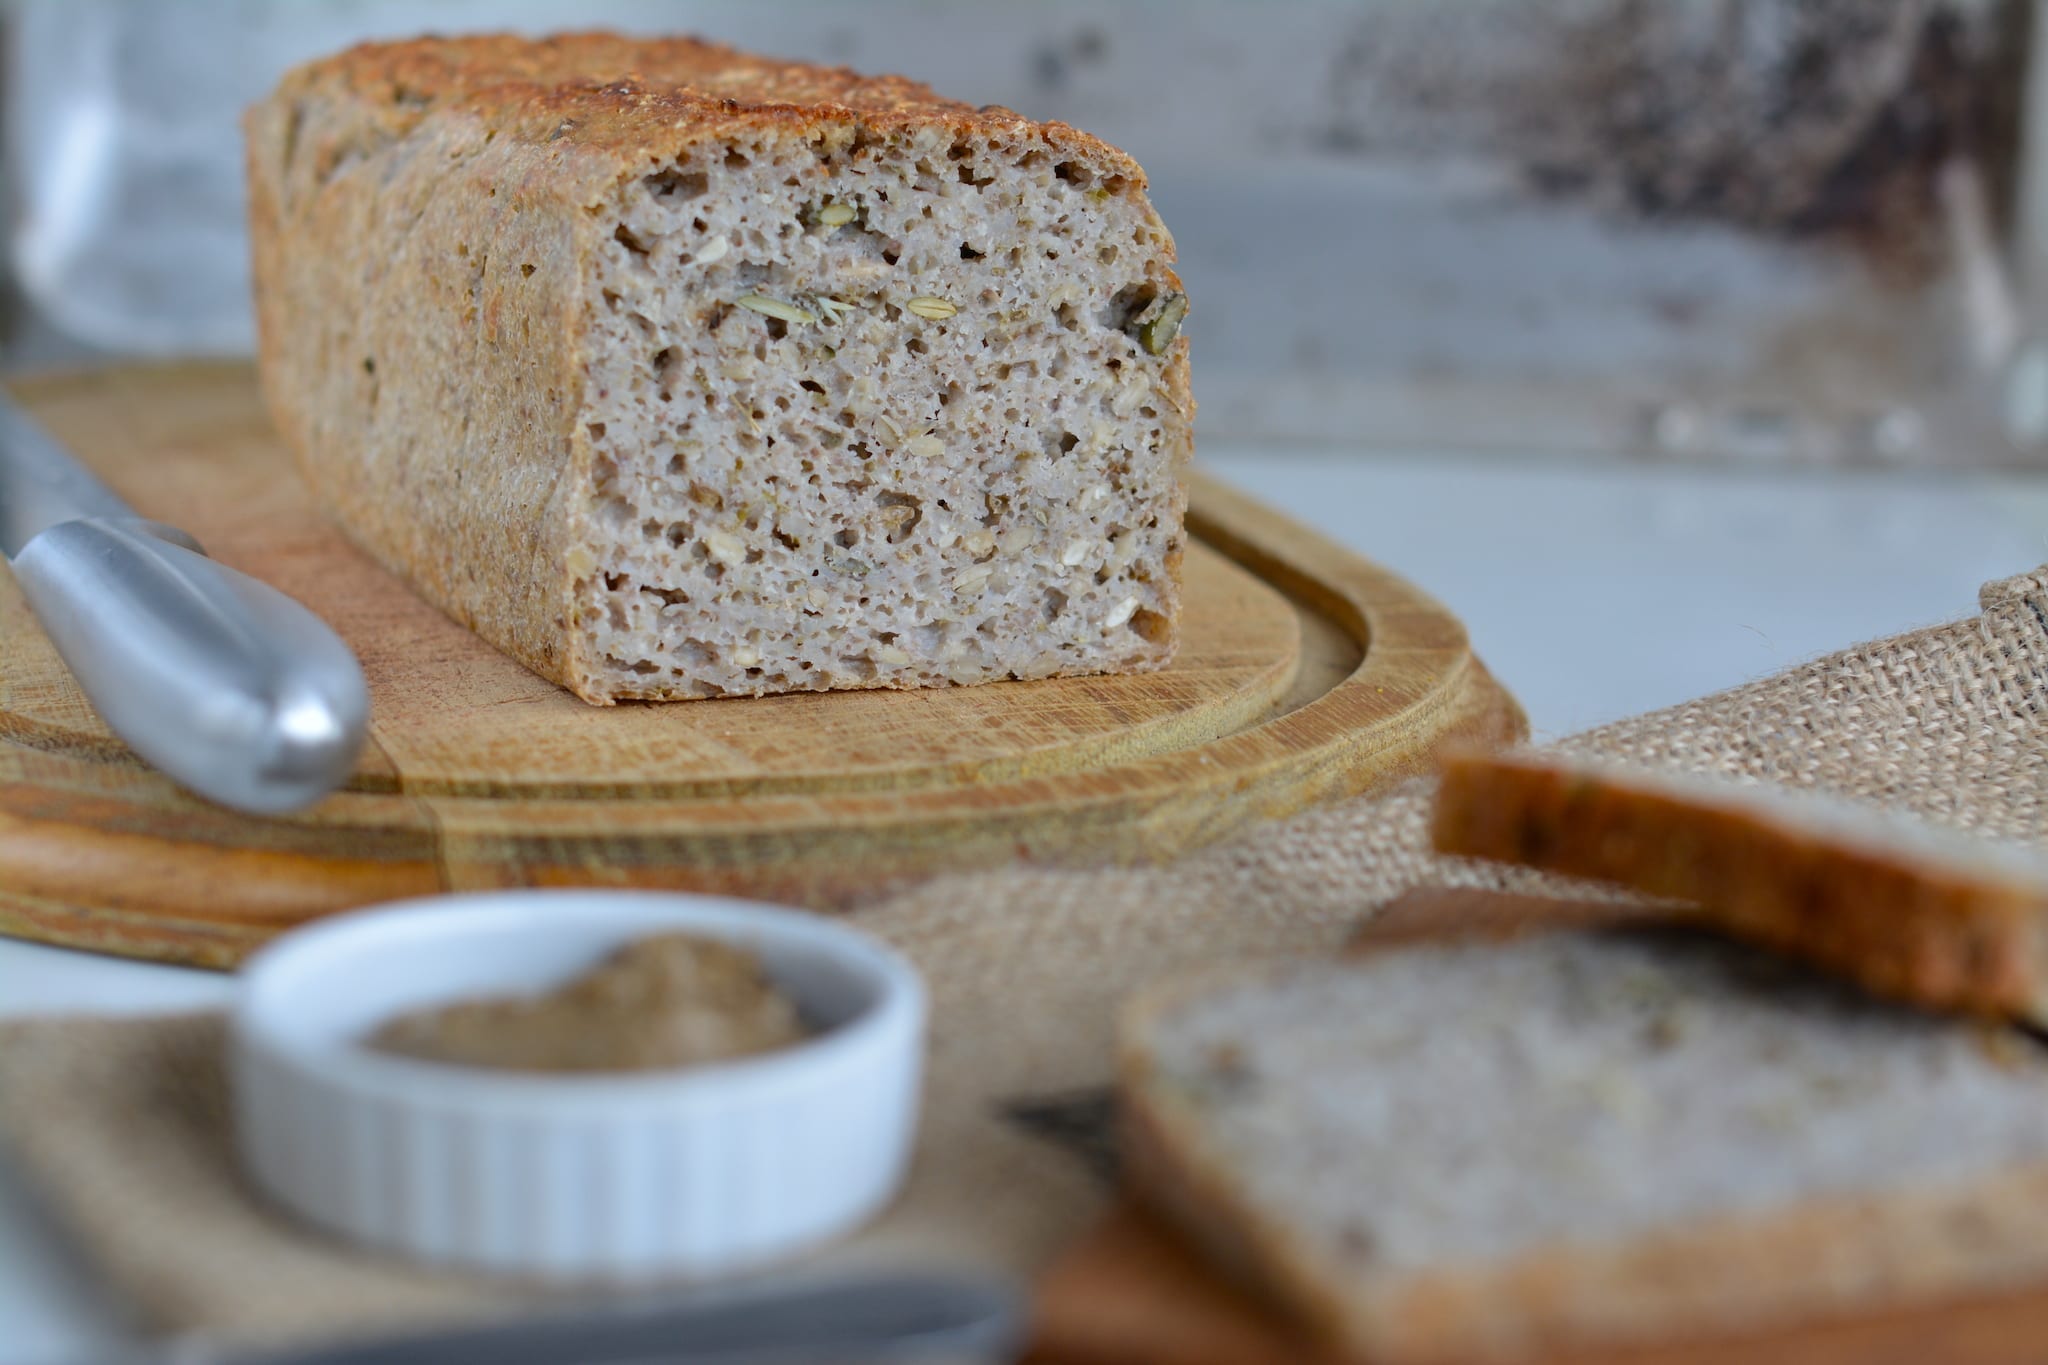
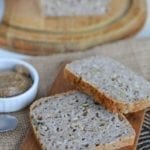
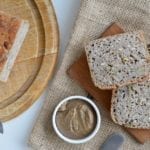
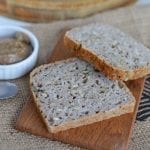
If you used parchment paper, you can remove the bread from pan immediately and place it on folded kitchen paper (I use four layers) to absorb the moistness. Let the bread cool for at least 30 minutes before slicing (the longer the better).
How to Serve
In my experience, freshly baked sourdough bread is so damn good that you don’t even need anything to accompany it with. However, should you disagree, here are some ideas:
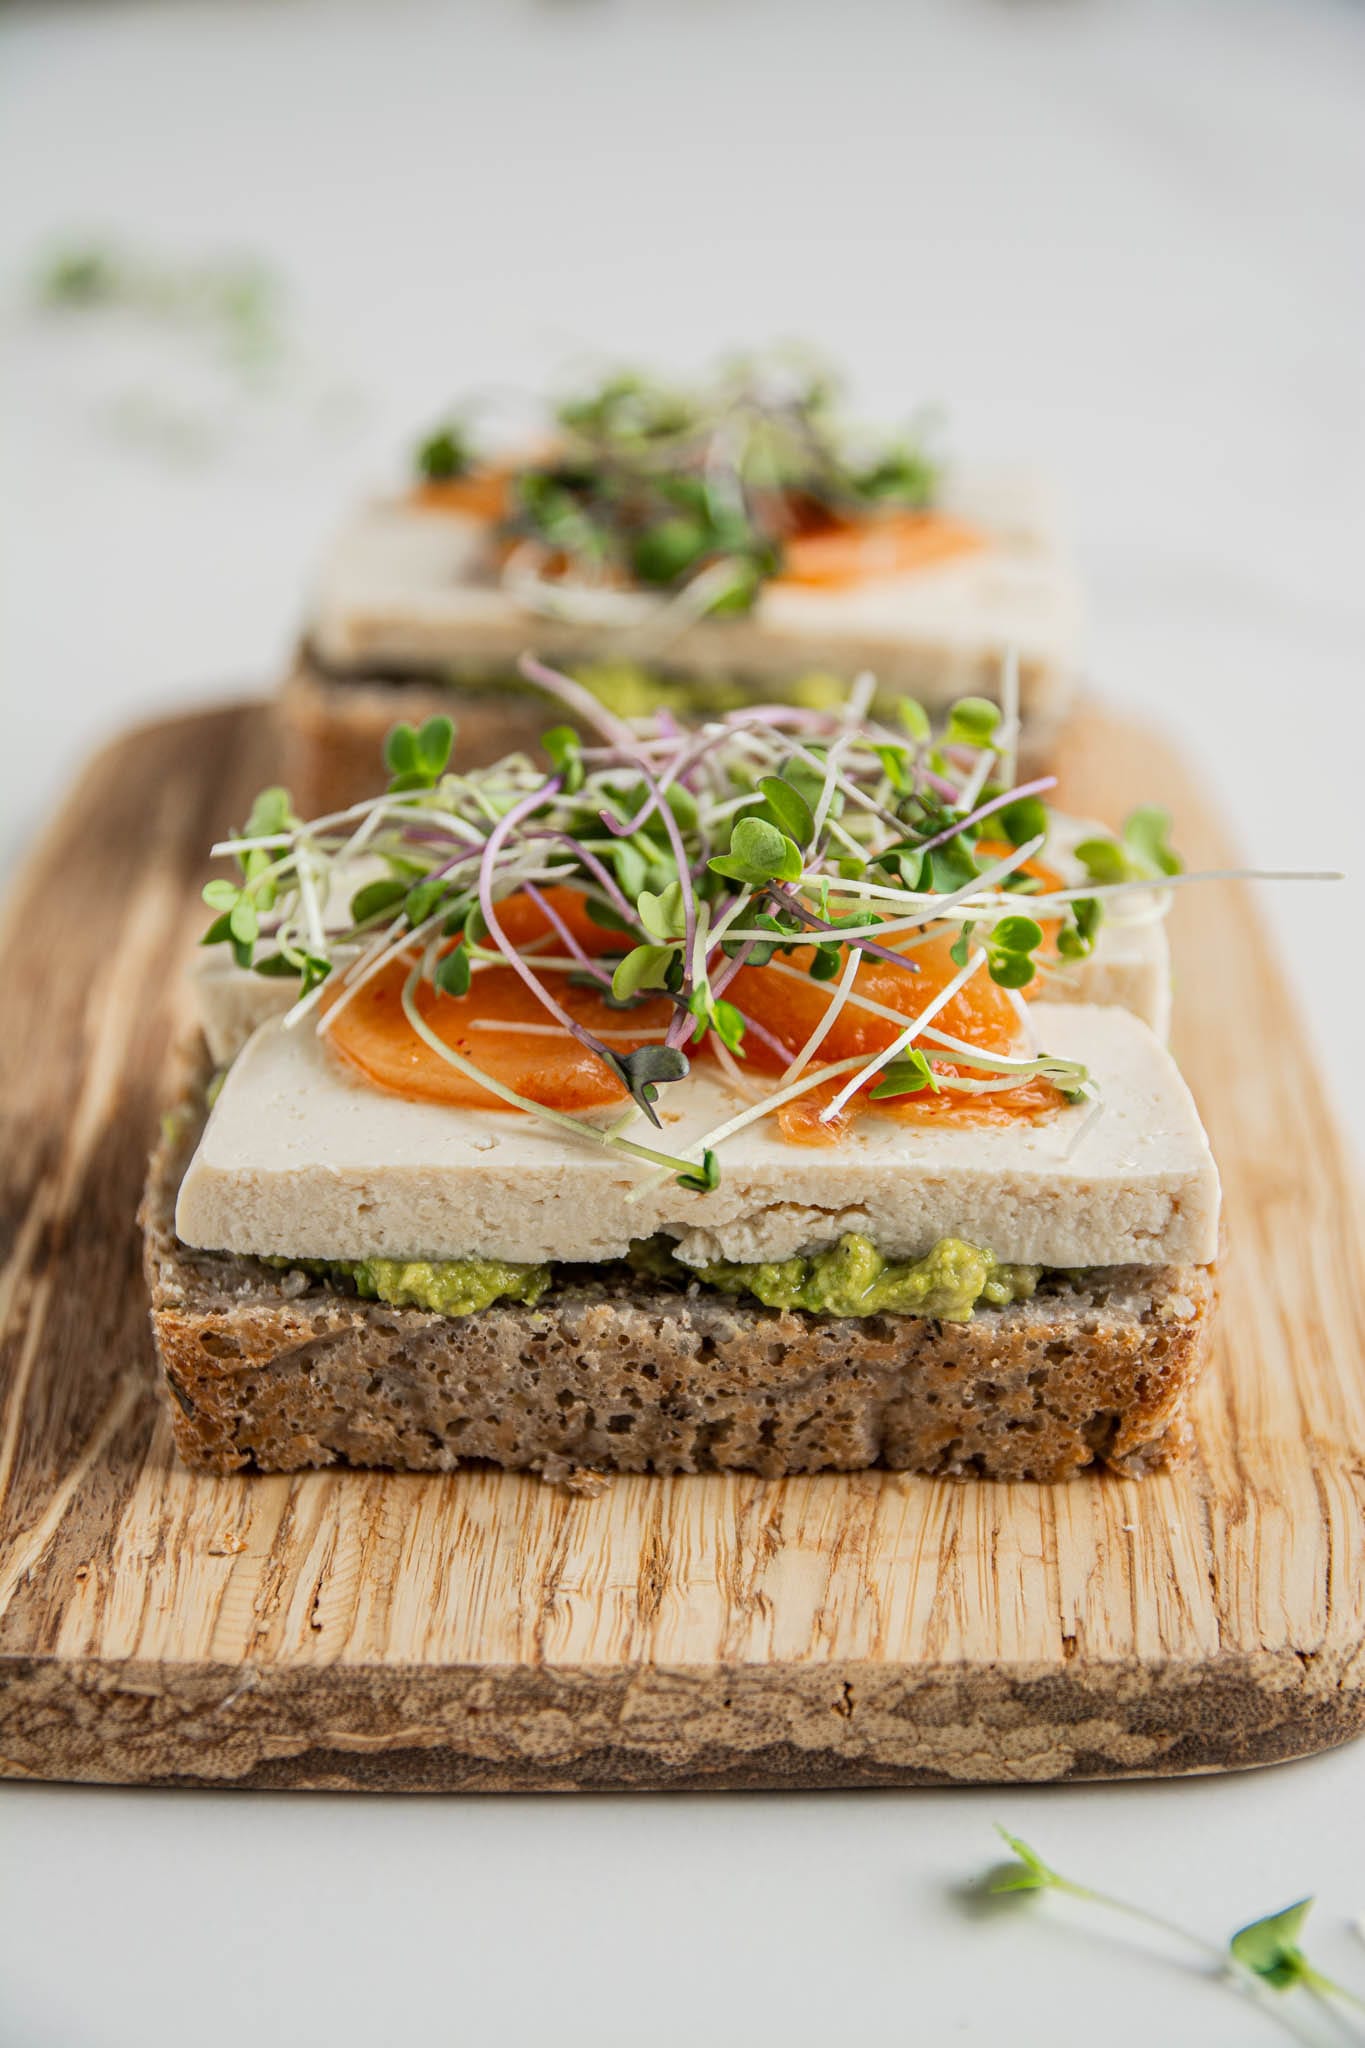
Spread the bread with homemade hummus, avocado, nut or seed butter (tahini, almond butter, peanut butter, cashew butter), homemade applesauce, hummus, homemade vegan mayonnaise, or even sweet buckwheat ricotta.
In addition, top it with red cabbage coleslaw, sauerkraut, kimchi, tofu or tempeh slices, or vegan egg salad.
You can use a few or many of the options mentioned above and build an epic healthy vegan sandwich. On the photo below I used avocado spread, fermented tofu, kimchi and broccoli sprouts for delicious toasts.
How to Store
When the bread is cooled, wrap it into a clean kitchen towel and stick it into a plastic bag to prevent losing too much moisture. It keeps well on countertop for 2 days.
For longer keeping, slice the bread up as soon as it’s cooled and store the individual slices in freezer. Heat them up in a microwave (for soft result) or in oven or toaster (for crunchy slices).
In order to toast the frozen sourdough bread slices in the oven, place them onto the rack (not on a baking sheet), set the oven to fast heat function (175°C, 350°F is enough) and timer to 10 minutes. When the time’s up, you’ll have fresh and crispy bread ready to enjoy.
I have made fermented buckwheat bread for two years now. I was a bit tired of rye bread and thought that it should be possible to ferment buckwheat as well. So, I started to search online (not to invent a wheel) and found a recipe by Concious Catering. After playing with the quantities and ingredients I developed my own favourite fermented buckwheat bread recipe.
Make sure to watch the below video for visuals!

Step-by-step visual guide to building your own balanced bowls.
Fermented Buckwheat Bread Recipe
- Total Time: 1 hour 10 minutes
- Yield: 22 slices 1x
- Diet: Vegan
Description
Learn how to make fermented buckwheat bread that uses no starter and is also gluten-free and sugar-free.
Ingredients
- 425g (15oz) raw buckwheat groats
- 290ml or grams of water (10.2oz) + water for soaking buckwheat
- ½ tsp. Himalayan salt
- 2 tbsps. oregano
- 3 tbsps. of sunflower seeds
Instructions
- Soak buckwheat groats for at least 6 hours. It’s very important to rinse the soaked groats well (they get slimy after soaking) and let drain for at least 5 minutes to get the extra water out. If you don’t follow this step with scrutiny, your batter may end up too runny and the bread won’t rise.
- Place drained buckwheat groats into blender with 290ml of water. Blend on low speed until smooth batter forms.
- Pour the batter into plastic or glass bowl (do not use metal bowl). Cover the bowl with clean cloth and place into a warm oven (35°C, 95°F).
- Let the batter ferment for 7 hours. After 7 hours you’ll see that the batter has risen and small bubbles have formed. If you don’t see that, let it ferment a bit longer. Now add all the other ingredients to this buckwheat bread recipe, gently and briefly stir with wooden or plastic spoon (do not use metal spoon). Do not over-mix as the batter will lose its fluffiness.
- Pour the batter into a loaf pan lined with parchment paper. Now, you can put the bread back into warm (not hot!) oven and let it rise for another few hours or you can bake it immediately for 1 hour at 175°C (350°F). Let the bread be in the oven while it warms up. Count the hour from when the oven has reached the right temperature.
- If you used parchment paper, you can remove the bread from pan immediately and place it on folded kitchen paper (I use four layers) to absorb the moistness. Let the bread cool for at least 30 minutes before slicing (the longer the better).
Notes
One slice has 7.3 GL points.
- Prep Time: 10 minutes
- Cook Time: 1 hour
- Method: Baking
Nutrition
- Serving Size: 45g (1.6oz) slice (1/22 of recipe)
- Calories: 69.3 kcal
- Sodium: 26mg
- Fat: 1.07g
- Carbohydrates: 11.7g
- Fiber: 1.24g
- Protein: 2.58g
Zinc is an essential mineral that supports the immune system, digestive system, cellular growth and development, and more. This certified organic, liquid formula contains zinc derived from guava leaves, enhanced with Energized Trace Minerals for increased bioavailability.
Other combinations for flavouring:
- Olives and oregano
- Sundried tomatoes and oregano
- Sesame seeds and oregano
- Walnuts, prunes, cinnamon
- Sunflower seeds, pumpkin seeds, oregano
- Raisins, cinnamon
- Poppy seeds, goji berries
Tips on this fermented buckwheat bread:
- If you can’t set your oven to such low temperatures, ferment the bread batter at room temperature. I’d still recommend putting the bowl into oven for the most stable environment (less temperature changes or breeze). It’ll take about 16-24 hours.
- It is at its best when fresh.
- Slice the leftover bread and store in freezer. Heat up in the oven or toast slices whenever needed.
- Eat as it is or with hummus, guacamole or nut/seed spread for example.
- Should you like more sour taste, ferment the batter for longer.
Disclosure: this post contains affiliate links. As an Amazon Associate and Global Healing affiliate I earn from qualifying purchases. For every purchase made from the links in this post, you’ll be able to support my work. So you can look after your health, and contribute to my mission at the same time. Thank you!
Feel free to PIN the below image!
This post is also available in: Spanish


Hi Nele! thanks so much for sharing this amazing recipe! I’ve been making it weekly for several months now and it’s become my go to breakfast. My doctor has recommended I increase the quantity of omega containing foods in my diet and I thought about adding flaxseed to the loaf. Is this something you’ve tried? If so how much would you add and at what stage of the recipe?
Hi Adam! I’m so glad to hear you’re loving this bread! Try adding ground flaxseeds along with herbs and salt when the batter is fermented. However, start with a small quantity as flaxseeds tend to change the consistency (being a binder). A great way to increase your omega 3s would be chia pudding, but grind the seeds first. You can also add ground flaxseeds to any dessert bowl — I like to make raw buckwheat cream with berries. You can watch how I make it in my latest video Dr. Greger’s Daily Dozen https://youtu.be/YRvTSu26L64 All the best!
Thanks Nele! I’m going to make a loaf today with the flaxseed and see how it goes. Also thanks for the video link, that app seems like a great way to stay on track with balanced nutrition 🙂
Let me know how it goes! And yes, that App has a great value!
I added 4 tbsp of ground flaxseed to the loaf before baking and it turned out well. It slightly altered the flavor and seemed a little more dense than usual but still just as good ?
That’s great to know! Maybe try adding a tbsp less of flaxseeds or then adding a bit more water when blending the batter (a few tbsps).
Thank you. I’ll try that way next time ?
Wow! Thanks for this amazing recipe! I tried it today. It came out great and I had not fermented it enough because i put it wrapped up before bed thinking that would be enough time except only 7 hours had passed, oops. so no bubbles but it still made a great bread! I recently had made another persons recipe with almost the same ingredients and it didnt taste good, they kept the goo on after soaking and it came out gummy and dense, then I tried it again and it still didnt taste that great. This one is excellent! Thanks for all the testing to make something come out so consistently!
I’m so glad to hear that Adrienne! Thank you for sharing your experience!
Hi Nele,
Thanks for the recipe! I tried to bake this, I think it turned out well. I was meaning to ask you. My oven didn’t have a low temperature setting. So I let it to ferment in room temperature (27 – 30 Celcius) for 14 hours. I realized there was some bad smell starting to emanate from the batter. Ignoring the smell, I continued to follow your recipe and mixed with salt & sunflower and pumpkin seed, poured onto bread pan, left it to ferment for another 2 hour and baked it for 1 hour. Is the bad smell a normal thing during the fermentation process? Or did I ferment too long? The batter have risen and there were lots of bubbles. The top layer were slightly yellowish. The odour lasted until I finished baking. After I cut into slices, the smell has reduced a lot and was not too bad before I ate them. Secondly, I found it really hard to remove the bread from the parchment paper after baking. It totally sticked to the parchment paper. If I use force to remove it, the paper gets torn. Is there anything I’m doing wrong. Hopefully you will help to clear my doubt! Thanks in advance!
Hi!
I’m so glad you liked the recipe!
In case of 30C maybe yes 14 hours is too long, 8-10 hours should be sufficient.
If the batter ferments for too long, it starts to smell a bit, but the baked bread is still tasty.
As far as the parchment paper is concerned, did you let the bread cool down before trying to remove it? If so, and it still stuck, you could try a different brand or even wax paper. The one I use comes off really easily.
I hope this helped!